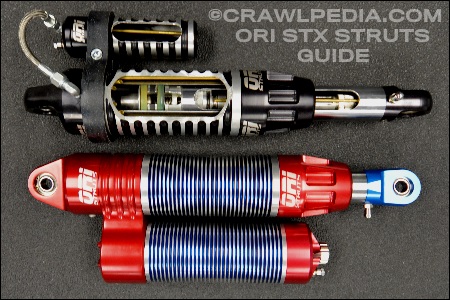
ORI STX Struts Guide
ORI STX Struts have become a very popular alternative to coilovers and nitrogen shocks because they are packed with many advanced features including a built in hydraulic bump stop, a 3 stage compression stoke, body lean control, anti-push off valving, and adjustable rebound valving.
ORI was founded in 2002 and since then they have revised and improved their struts numerous times and overcome several manufacturing hurdles to get to where they are today with a perfected product that is always in stock.

What is an ORI STX Strut?
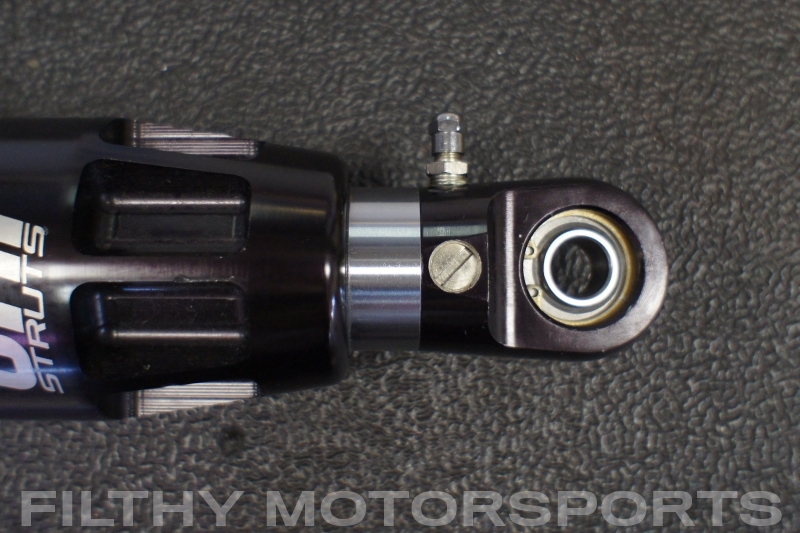
ORI STX Struts are both a spring and a shock absorber in one assembly that can be easily adjusted to set the spring rate, vehicle ride height, and motion damping characteristics. The brilliance of the design lies in the dual opposing nitrogen chambers that act as two nitrogen shocks pushing against each other. By adjusting the pressure in each chamber, you can change the height at which the strut sits to set your ride height as well as how much resistance is needed to control articulation and body lean. A built-in highly progressive 1" stoke hydraulic bump stop helps absorb hard bottom-outs while the ultra tough construction allows the strut to act as its own limiting strap. Finally, an external rebound adjustment dial built into the lower rod end allows for fine tuning of the rebound damping.

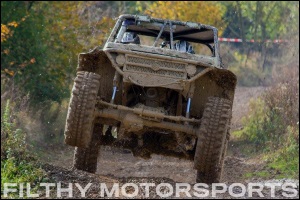
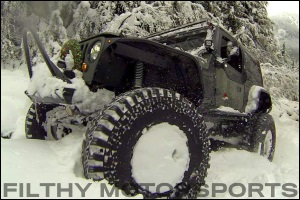
The only downside to an ORI Strut is that it depends on nitrogen gas to act as the spring and support the vehicle. When a gas is compressed it creates heat and if that heat cannot be dissipated it will eventually cause the shock to fade. While the ribbing on the strut cylinder is designed to help with cooling, continuous hard and fast movements will create more heat than the struts can handle which is why they don't work well for desert racing. In short aggressive bursts, however, where the struts are given a chance to cool down in between runs, the struts work extremely well which is why more and more rock bouncers and hill climbers are using them.
Is An ORI Strut Right For Your Application?
Deciding if ORI Struts are right for you is very simple. If your vehicle weights between 3,000 and 5,000 lbs. and is used exclusively for technical rock crawling, trail running, or short aggressive runs like rock bouncing or hill climbing, then ORI Struts are definitely worth considering. On the other hand, if you regularly go on long endurance runs, drive high speeds over rough terrain, or if your vehicle weighs over 5,000 lbs., then you would be better off running coilovers.
There is, however, some wiggle room with the overall vehicle weight because even though ORI lists the load capacity of their struts at 1,900 lbs. per corner, it is not that simple. ORI Struts don't technically have a load capacity limit, it's more a balance between load capacity, performance, and heat dissipation. The heavier the vehicle is, the more aggressively the suspension is cycled, and the longer it is driven, the faster the struts will overheat. So while they could technically support a 10,000 lb. vehicle, having them overheat within 5 minutes of use is impractical.
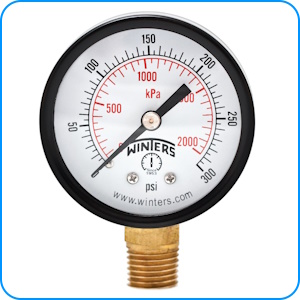
Ideally, when the struts are set up, there will be about 300 to 400 PSI in the upper chamber which tends to be the range where the struts work best. If that pressure exceeds 400 PSI, then one option is to add the available external reservoir to increase the upper chamber volume and thus decrease the required pressure.
What Size ORI Struts Do You Need?
ORI Struts are roughly the same size a 2.0 coilover with springs (3.25" OD) so if you are converting from coilovers to ORI struts they will often be a direct replacement. One big difference, however, is that unlike a coilover, you do want to bottom out on ORI Struts to make use of their built in hydraulic bump stops. This means that when you are measuring for ORI Struts, you will want to push the axle into the full compression position and order struts that are a bit longer than that measurement. For detailed setup instructions, see our coilover measurement and setup guide.
| ORI Strut | Travel | Compressed | Extended | Weight |
|
| STX08 | 8" | 15.825" | 23.2" | 9.7 lbs. |
| STX10 | 10" | 17.825" | 27.2" | 10.9 lbs. |
| STX12 | 12" | 19.825" | 31.2" | 12.2 lbs. |
| STX14 | 14" | 21.825" | 35.2" | 13.4 lbs. |
| STX16 | 16" | 23.825" | 39.2" | 14.6 lbs. |
| STX18 | 18" | 25.825" | 43.2" | 16.0 lbs. |
| STX20 | 20" | 27.825" | 47.2" | 17.2 lbs. |
|
(Measurements are from eye to eye. Click here for ORI Strut pricing.)
How Do You Set Up and Tune an ORI Strut?
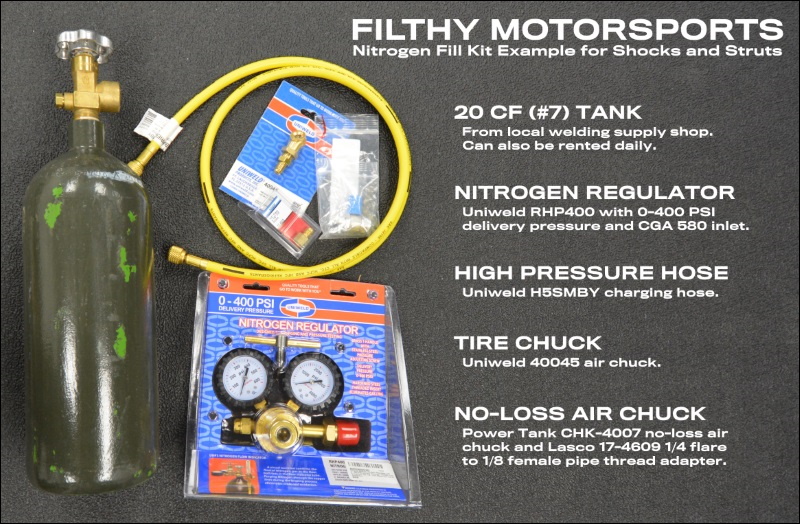
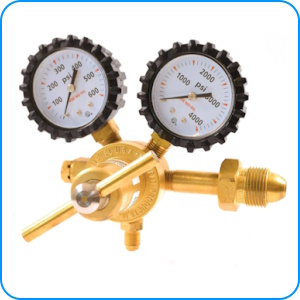
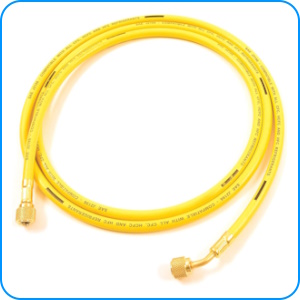
ORI includes a Quick Start Guide and a detailed User Guide with all of their struts. The installation, set up, and tuning procedures are very easy and the only tool you will need is a nitrogen fill kit comprised of a nitrogen tank, 400+ PSI regulator, connection hose, and a no-loss air chuck (click on the image below for a parts list). The process goes as follows:

- Mount the struts on the vehicle uncharged (full compression).
- Pressurize the lower chamber to 100 PSI. (the struts will not move).
- Pressurize the upper chamber until the vehicle raises to ride height.
- Set the lower rebound adjustment dial in the middle position.
**Important: Follow all of the safety instructions provided in the ORI User Guide**
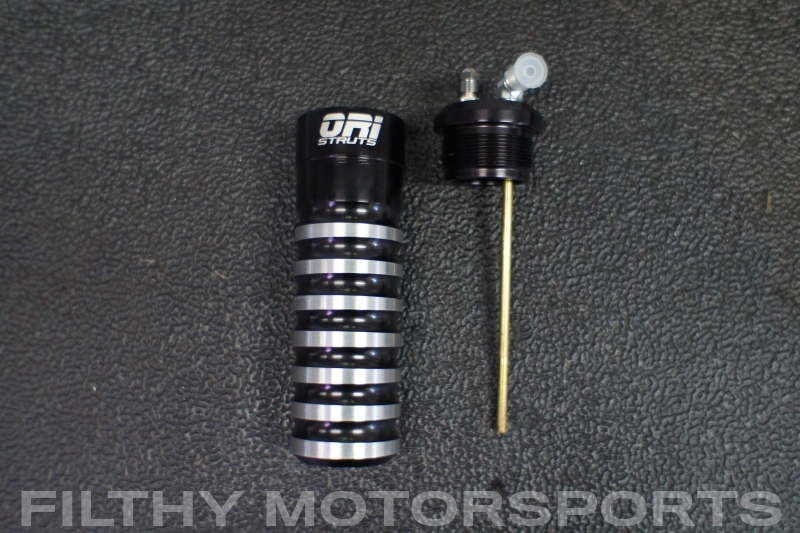
When you mount the struts on the vehicle, the first thing you will notice is that about 1" of shaft remains exposed on the struts. This is the built in hydraulic bump stop and it will compress into the cylinder under hard hits so make sure your suspension allows plenty of clearance for it.
Adding pressure to the lower chamber causes the struts to try and pull the vehicle down so don't expect it to lift up or move. Once there is 100 PSI in the lower chamber, you can pressurize the upper chamber to lift the vehicle up to your desired ride height. Keep in mind that when the struts are brand new, the seals are extremely tight and the movement may be a bit jerky. At this point you only need to get close to your ride height because you will make your fine tuning adjustments once the shocks have had a chance to cycle and warm up during your first tuning session.
With the pressures set and the vehicle at ride height, go for your first test run. Start slow and work your way up to get an initial feel for the struts. If the ride feels too firm or stiff, you will want to reduce the lower chamber pressure. If the ride is too soft and uncontrolled, you will want to increase the lower chamber pressure. After changing the lower chamber pressure you will need to adjust the upper chamber pressure to fix your ride height.
Further fine tuning can be done by turning the external rebound adjustment knob clockwise for slower rebound and counter-clockwise for faster rebound. That's all there is to it!
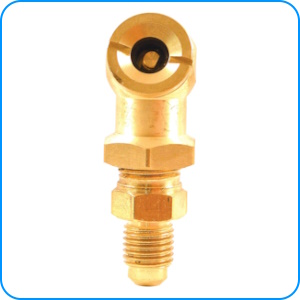
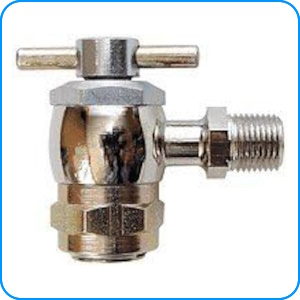
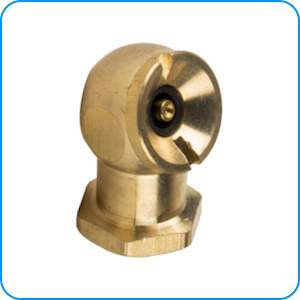
Assemble a nitrogen fill kit with these parts from Amazon.
Put together your own Nitrogen Fill Kit with a pressure regulator, connection hose, and an air chuck or no-loss air chuck. The only other item needed is a nitrogen tank that is available at any local welding supply shop.
As an Amazon Associate, we earn a small commission on purchases which does not affect your pricing.
How Do ORI STX Struts Work?
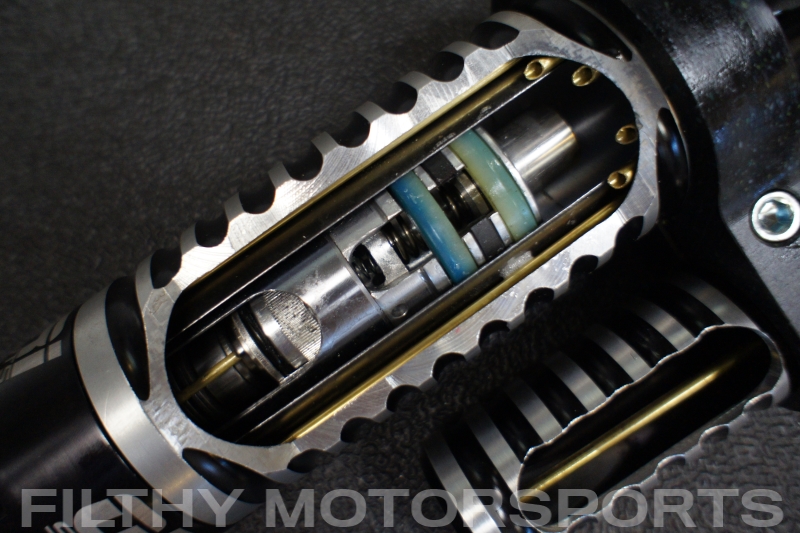
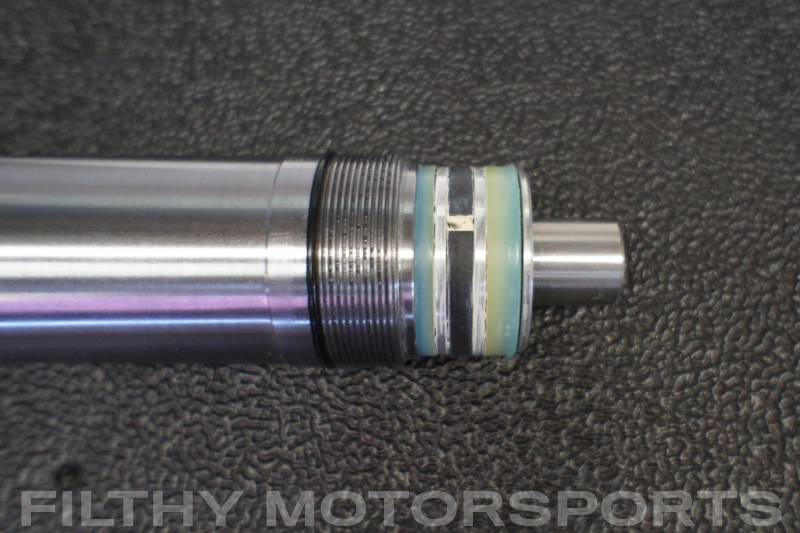
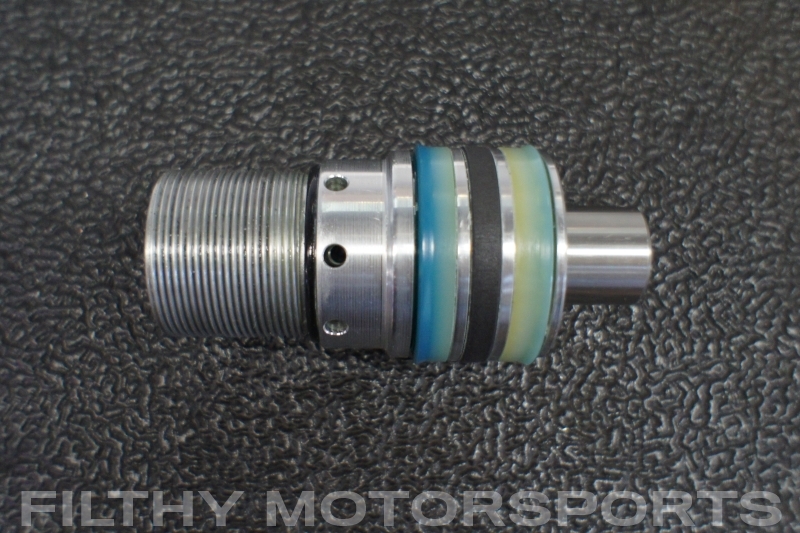
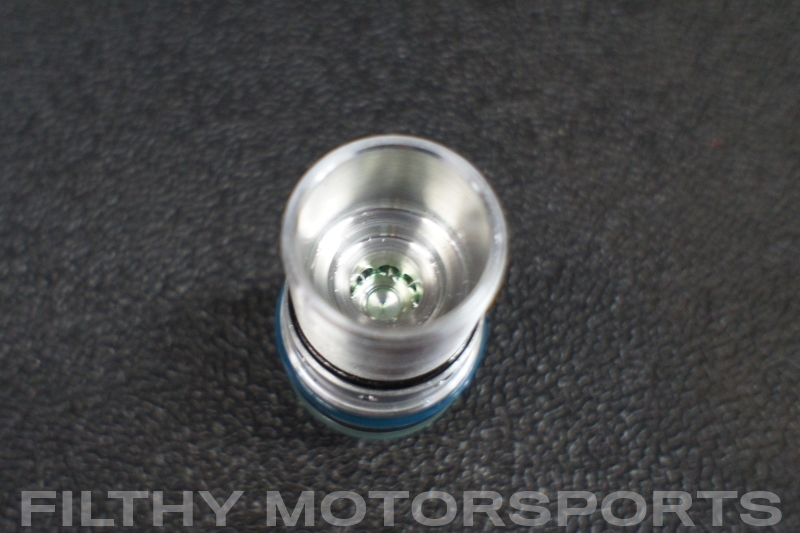
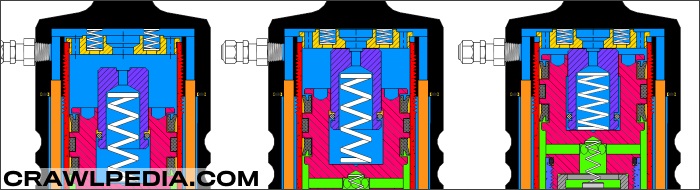
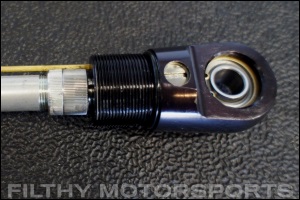
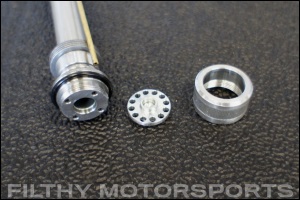
ORI STX Struts are far more complex than any coilover or air shock. They are made up of over 50 individual pieces, almost all of which are CNC machined in-house by ORI. The basic concept of the ORI strut design is two opposing nitrogen shocks that push against each other to create resistance. By adjusting how much the two shocks push against each other you can change the pushing force of the strut (spring rate) and also the force needed to move it from that position (stability). Add to that velocity sensitive compression valving, externally adjustable rebound valving, and a 1" hydraulic bump stop all packed into a 3.25" OD cylinder and you can see how this was no easy task for ORI to develop, much less perfect.
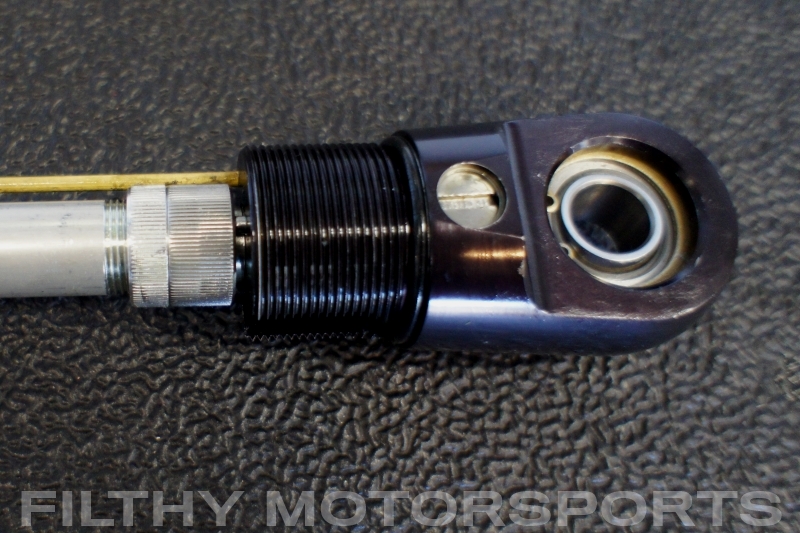
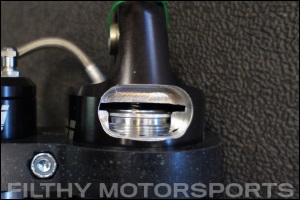
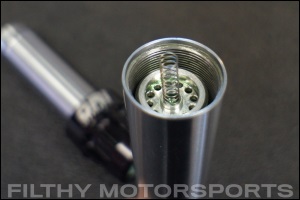
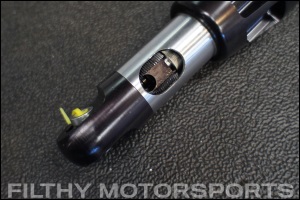
The hydraulic bump stop alone is a brilliant piece of engineering. The bump stop is built into the top of the shock shaft and is held up by an internal spring. As the shaft approaches full compression, it lifts up on the top compression damping plate (yellow in the diagram below) pushing it against the top of the strut body. As the strut compresses further it tries to push the oil from inside the bump stop through the compression damping plate which is being forced against the top of the strut pinching off the oil flow. The harder the bump stop pushes, the more energy is absorbed pushing the oil through the damping plate. This design allows the last 1" of stroke to absorb a tremendous amount of energy.
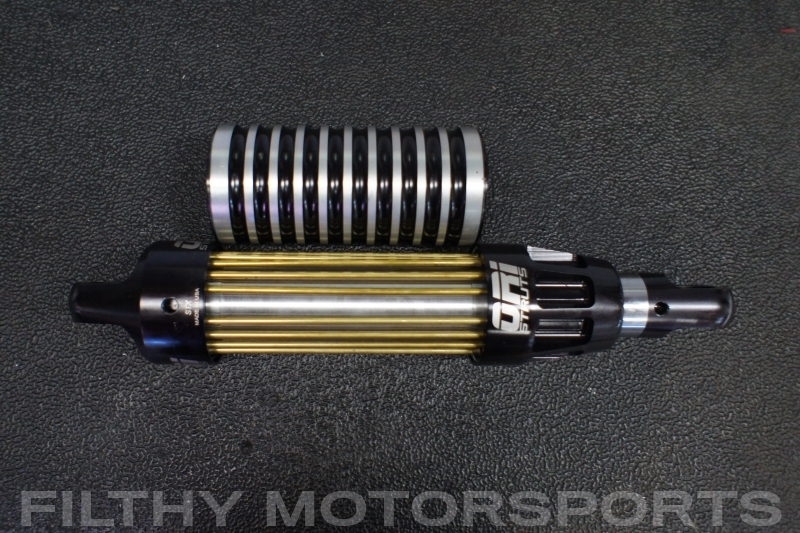
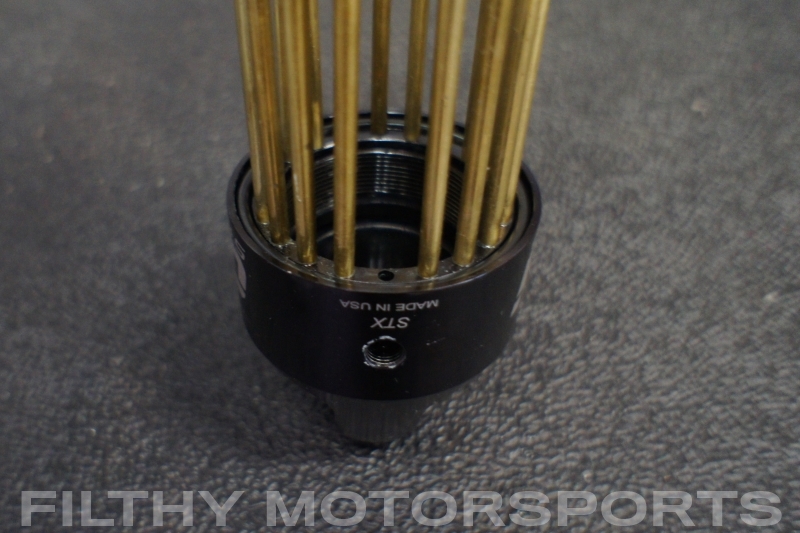
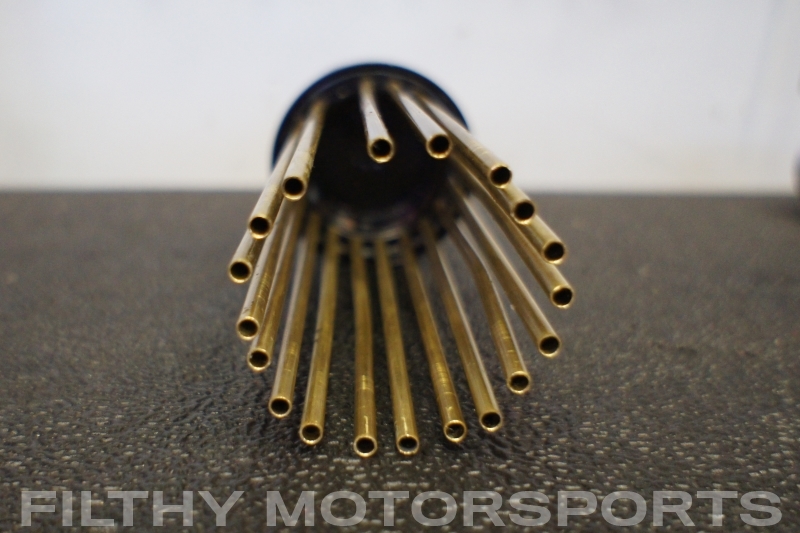
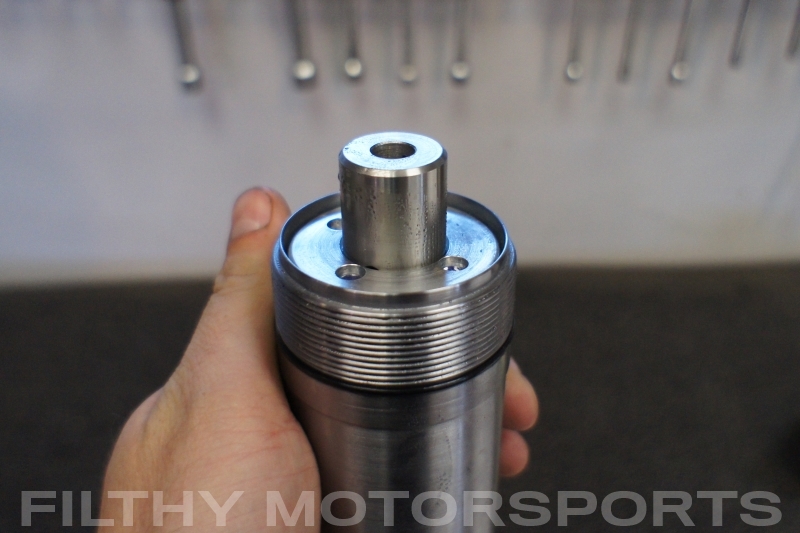
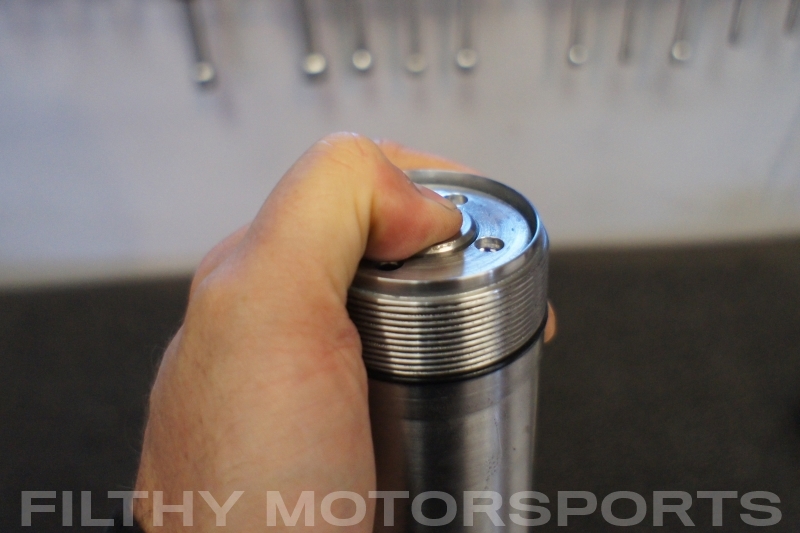
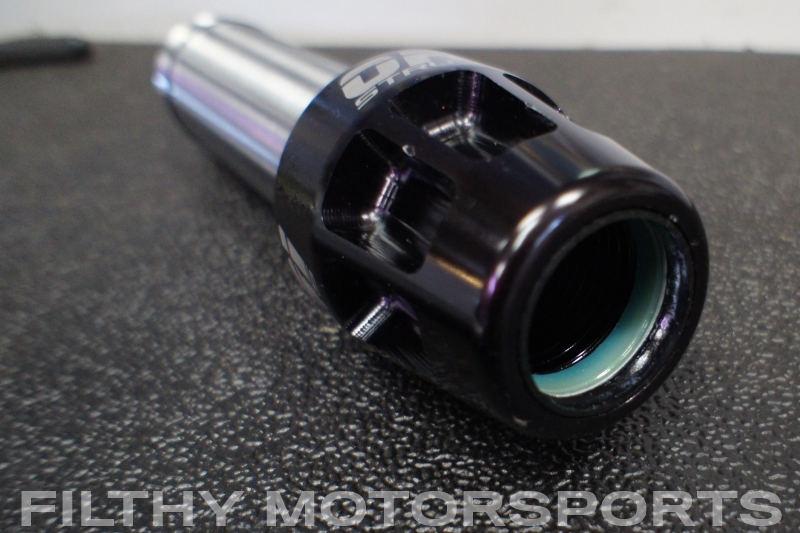
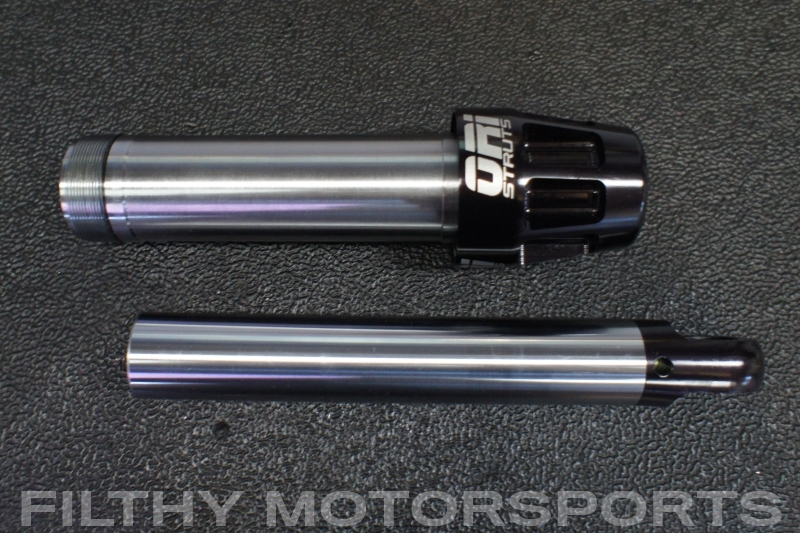
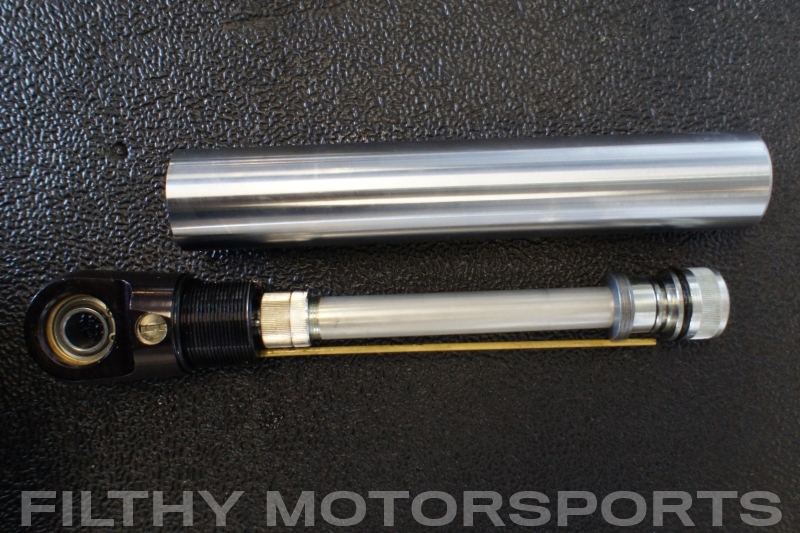
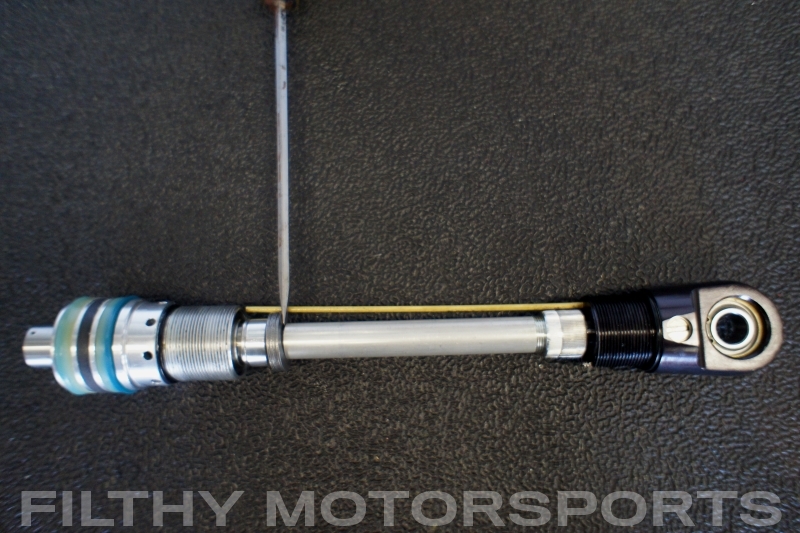
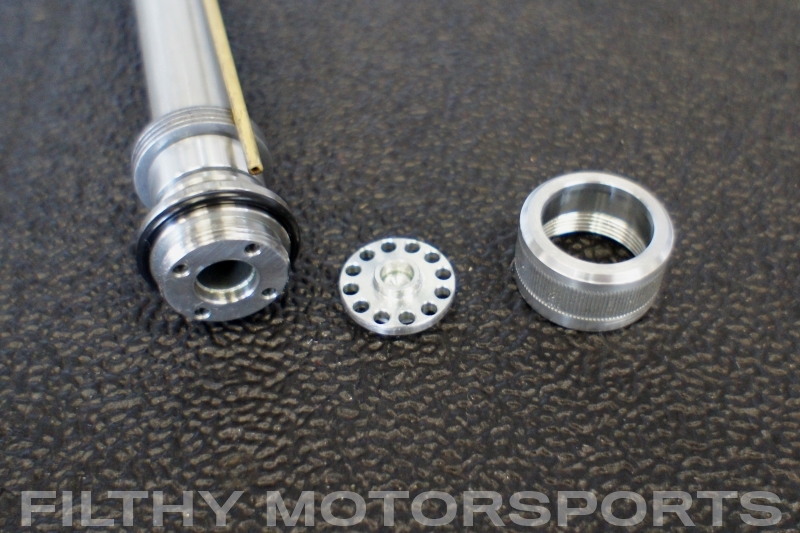
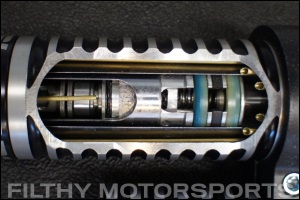
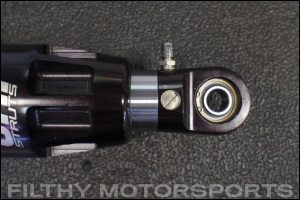
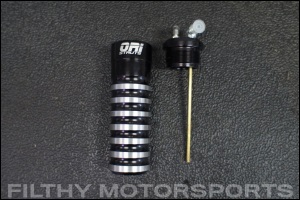
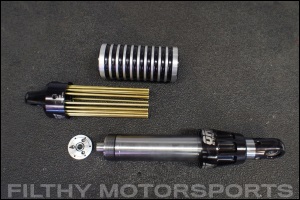
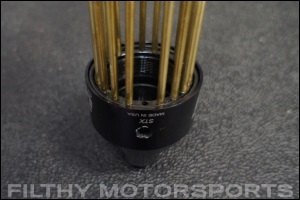
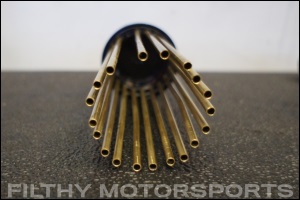
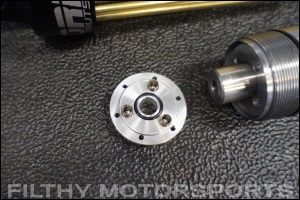
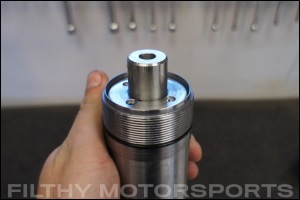
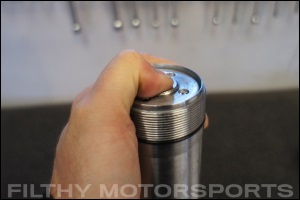
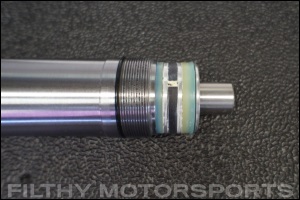
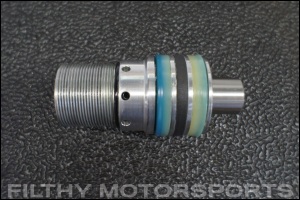
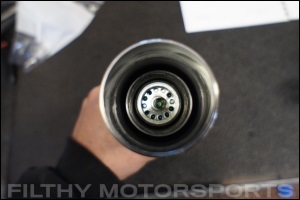
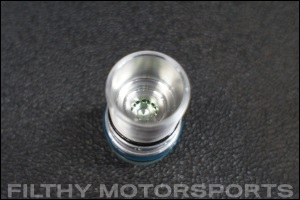
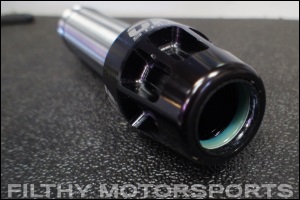
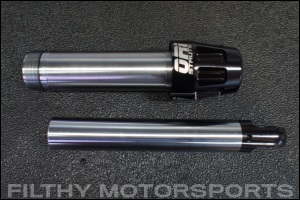
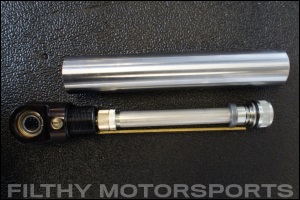
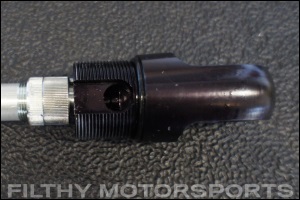
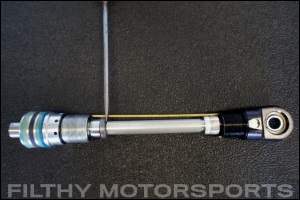
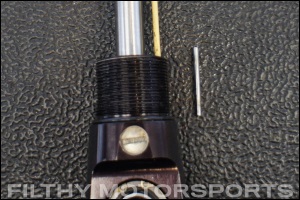
What is Inside an ORI STX Strut?
Take a look at the construction and internal components of an ORI Strut in these photos courtesy of Filthy Motorsports:
The strut in the photos below is from a few years ago and may not reflect any changes or improvements made since then.


This ORI Strut guide is ©Copyright Crawlpedia.com - Please provide a link back to this page when copying.
Data is accurate to the best of our knowledge and is offered as-is with no guarantee.
More Shock Guides:
Shock Rebuild Instructions - Detailed step-by-step instructions for rebuilding high-performance shocks.
Shock Rebuilding Tools - A list of tools needed to service high-performance shocks and coilovers.
Shock Valving Guide - A guide to high-performance shock valving and valving shim configurations.
Shock Tuning Guide - A guide to how high-performance shocks are tuned and valved to work well.
Shock Valving Shim Stack Examples - A list of common, basic valving shim stack configurations for high-performance shocks.
Coilover Spring Rate Calculator - A calculator to help you determine a good starting point for coilover spring rates.
4-Link Suspension Guide - A quick overview of the most important elements of 4-link geometry.
Shock Rebuild Parts - A link to Filthy Motorsports' shock parts page.
How To Measure For Coilovers - Order the right size shocks and coilovers by following these detailed instructions.
Coilover Install and Setup Guide - Proper coilover installation, setup, and fine tuning instructions.
Coilover Spring Re-Calculation Guide - How to easily correct coilover spring rates to achieve your desired ride height.
ORI STX Struts Guide - An introduction to ORI STX Struts, how they work and how to tune them.
Hydraulic Bump Stop Guide - A detailed overview of hydraulic bump stops and jounce shocks for off-road use.
Filthy Motorsports
High performance off-road racing parts and professional shock tuning. Learn more at
FilthyMotorsports.com
Shock Service, LLC
Professional shock tuning and rebuilding services for King and ADS shocks. Learn more at
ShockService.com
Polar Cryogenics
Cryogenic treatment improves strength and longevity of gears, axle, and brakes. Learn more at
PolarCryogenics.com
Crown Race Gears
Race-spec ring and pinion gears for desert racing, rock bouncing, and rock crawling. Learn more at
RaceGears.com